Friday, November 1, 2013

Digital Signage in the Church Setting

The latest project has been trying to get a digital sign up and running in the church.  I thought I'd give a little breakdown of the project.

The Concept: Create a Digital Sign that can list church activities, announcements and other important information.  It must be cheap, easy to update and be upgradable for the future.  It also must have an anti-theft device to dissuade someone from trying to steal it since it is in an open area.

The Challenges: Coming up with a system that can be edited easily but doesn't cost an arm and a leg.  There are great sign companies out there providing great solutions for a fee.  You could always get a TV with a USB reader and load slides everyday.  But I wanted something that was easier than that.  I wanted it to be web-based so a volunteer could log-in and update it.

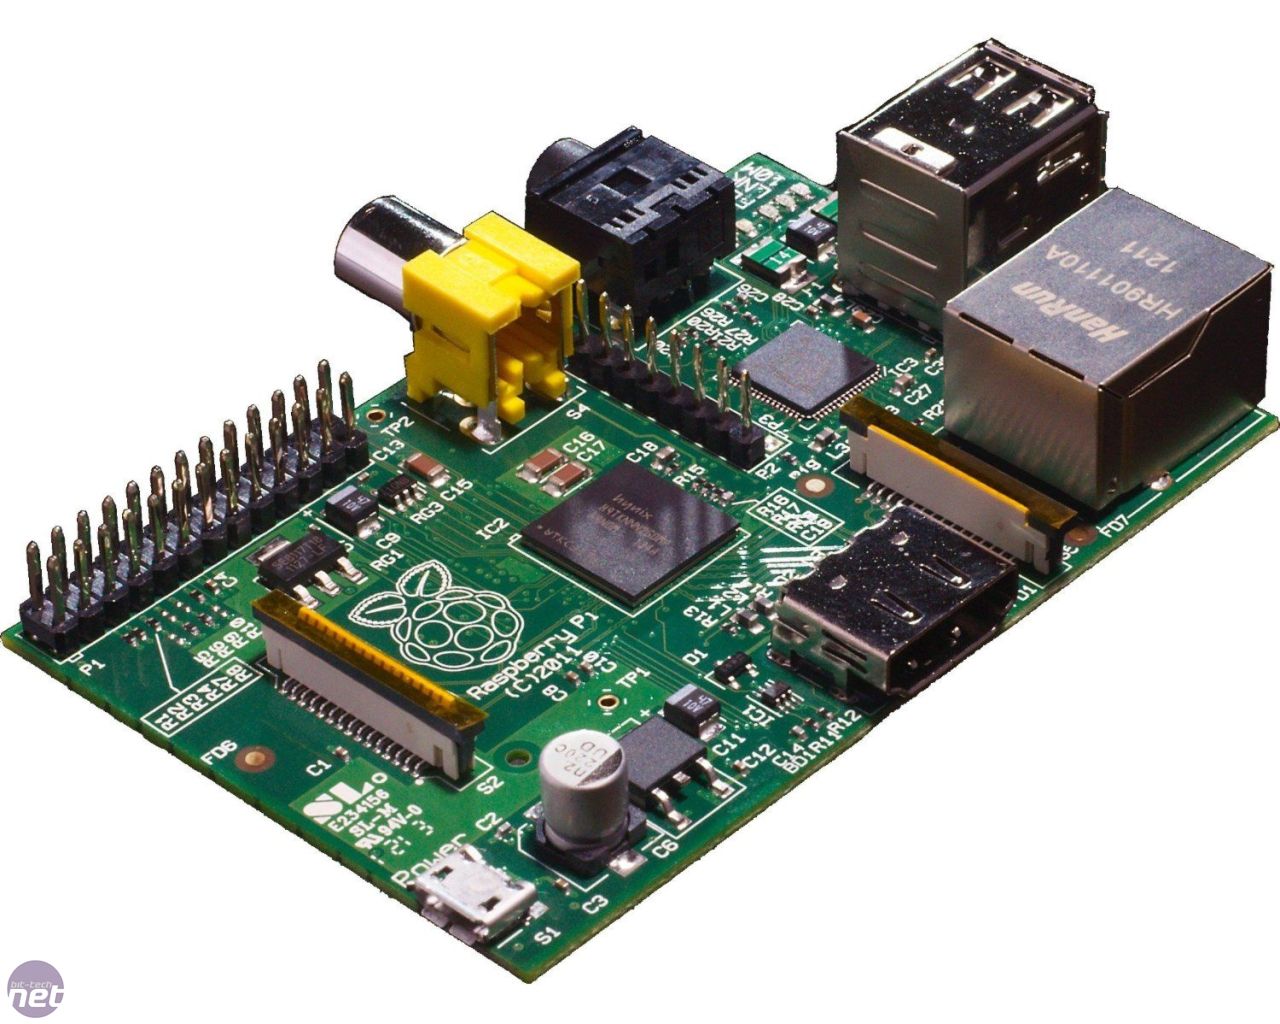
The Solution: Obviously any TV with an HDMI input will work.  The question is how to get info onto the TV.  Initially I thought about a recycled computer running Debian or Ubuntu but when I contemplated running a long enough HDMI cable to reach or the issue of powering it, I switched my focus.  What about a Roku, Boxee Box or Apple TV?  All legitimate options.  I landed however on the Raspberry Pi Model B.
This baby will run a modified version of Debian, uses 5v and so far will just run 24/7.

Building the Raspberry Pi to run the Digital Sign

This is my first project with the Pi and I must say I'm blown away.  Following the instructions I got Raspbian up and running on a 16GB SD card, it auto-loads into the pi user.  I found a Cell Phone Charger that would reach the 700mAh required on the mini-USB port and purchased a black case that allowed the standard ports to be visible (it also screwed together instead of snapped which is important for the security side of things).

With SSH access over the network I installed Chromium so I could run Kiosk mode.  

I simply modified the autostart file at /etc/xdg/lxsession/LXDE and added "@chromium --kiosk http://YourUrlHere"

You will find quickly the mouse stays in the center without any commands from the user so we also add an xwit command to force the mouse to the bottom corner: 

"@xwit -root -warp $( cat /sys/module/*fb*/parameters/fbwidth ) $( cat /sys/module/*fb*/parameters/fbheight )"

I figured out pretty quickly two things.  The operating system will blank the screen without activity AND Chromium will only show the site loaded at startup.  I needed a way to refresh the screen on a regular basis.  I first found xdotool which mimics key and mouse commands from the terminal and installed it.  This plays well so I can also sent automatic refresh commands from ssh. 

I then added a 15 minute cron command through crontab that calls the two parameters into play you need to refresh:

"export DISPLAY=:0" <--this calls="" display="" div="" gui="" initiated="" login="" the="">
"xdotool key F5" <--this acts="" chromium="" div="" f5="" hit="" keyboard="" like="" on="" refreshes="" the="" user="" which="">

When the device is turned on it will no autoload into pi, launch chromium in kiosk mode, put the mouse in the bottom right corner and then refresh the screen every 15 minutes.

Building The Sign Website

A couple people have discussed using Drupal for this type of idea but I didn't find a clear walk through. Below I'll try to explain what I did to set it up.  

First, I decided to go with an internal server so I setup a Debian box I have running our Unifi Wireless system to host a Drupal 7.23 website.  I like having my own box so I can install things with Drush.  You can of course use a web hosting company and point the Pi to the internet but if your building loses internet then your sign shuts down 15 minutes later with an error.  
  1. Install Drupal as you normally would
  2. Add the following Modules:
    1. Front Page
    2. Chaos Tools
    3. WYSIWYG Editor
    4. IMCE 
    5. Views
    6. Views Slideshow
    7. Libraries
    8. IMCE wysiwyg
    9. Draggable Views
    10. Entity
    11. Add the jquery files for the slideshow module
    12. Add TinyMCE (or other favorite editor) for WYSIWYG
  3. Add your favorite Theme Template (I used Adaptive Theme)
  4. Disable Comment module
  5. Remove all the Blocks you don't want displayed
    1. I have a header block to contain the Logo
    2. The main content block
  6. Go into the Image Style and setup any cropping you want for images you upload and thumbails
  7. Setup your Content type
    1. I created an Announcement that just has a Title, Image and Thumbnail
    2. I also created a Schedule content type that contains Title and Body
  8. Create a View that shows both types in a Slideshow Format
  9. Follow the instructions to create a draggable view
    1. I limited it to the title and thumbnails in a block
    2. Connect the draggable view to the main slideshow
  10. Create a View through blocks that shows unpublished content
  11. Setup Front Page to point to your slideshow link
Now you should be able to throw some content in and see how it looks.  I based mine on the 32" TV specs (1366 x 768).  All my images are no larger than that and the schedule content all contains a DIV marker that sets a background and size for now.  I plan to theme it into the system but just cheat by putting the code directly into the content body.  

The real challenge is making the back-end work properly.  I started by turning the authenticated user into the permission laden account for volunteers.  I gave them just enough access to change content and add stuff including the ability to drag the slideshow into order.  

I then went back into blocks and added the draggable block to the sidebar and made it visible only to authenticated users and admins.  This now becomes the link to the content AND the order it shows on the site.  I also enabled the Navigation bar for only the Authenticated and Admin plus I threw the user menu into the top menu location and limited it a link to which I titled Home and the Logout button.  

Security

Finally I mounted the TV in it's location in the Church.  I pulled off the back panel of the TV (note: you can easily damage the TV so do so with caution) and drilled holes for a U-Bolt and a hole for the Raspberry Pi case.  By bolting part of the case to the back of the TV I'm making it difficult to steal the Pi.  The Pi and the top part of the case then enclose the bolt.  

I then purchased a regular Safety Hasp from Home Depot along with a Master Lock and 6 foot cable.  I looped the cable through the U-Bolt on the back of the TV, looped the cable around the mount a couple times and locked it all to the hasp.  I made sure the hasp had at least 2 long screws going into a stud so you can't just rip it out of the drywall.  


There are still some clean-up things to do to make it look better but so far it's working properly.  We will see if the Church Volunteers will be able to maintain the information properly.  

Wednesday, December 21, 2011

Running CAT5

Thinking about Running CAT5 in your home or church?  Here are some tips and tricks to help get the job done.


  1. Know the different IEEE standards for plugs -

    It's really easy to just to make up the color code on the cable you're running but what about when someone comes along to modify or upgrade the system, following regular standards will assist them in figuring out what you did.  The IEEE standards with RJ45 plugs are T568A and T568B and look like this:

    Pick one of the above standards and use it consistently through your install.  This will save you time and money in the long run and the person who follows you will be able to know what you did and continue the pattern you started.
  2. Install a Wall Jack -


    So many people simply run the cable directly to the device you are trying to wire which ends up looking horrible and ultimately does leave much room for expansion or change.  Instead, installing wall jacks cleans up the cable clutter and reduces problems down the road for troubleshooting.  If it's in the wall and installed properly, you can rule it out from breaking.  If it's hanging from the ceiling and getting plugged into a device, the chance of the plug going bad from wear and tear is pretty good.

    Spend the extra money and run the wires properly, you'll save yourself and your organization a lot of headache and money in the future.
  3. Leave a Pull Line -

    Anyone who has tried to fish wires through walls knows the joy of finding a pull line.  It is so simple to pull a line along with your cable and leave it in the wall or ceiling for future use.  It also is really handy if something goes wrong with your install and you need to add another wire or redo what you have already done.  I like to use pink Mason Twine because of its strength and color but it's probably overdoing it.  Any bright color will help for finding it in the future.


  4. Use Plenum Cable - 

    Any CAT5Cable that's going through a wall should be Plenum.  Now, you've probably looked at the difference in cost but let me explain why.  Most Code requires specific fire-resistance on cables that run through a building and normal CAT5 does not meet these standards.  Plenum Cable will meet those standards and lets be honest...adding wire to your building that might escalate a fire is not a smart idea.  Spend the extra money and buy the box of Plenum CAT5.  

Saturday, July 16, 2011

Outcomes of Adding Technology

Top Five Reasons Churches spend money on technology:

  1. It Broke.
  2. Someone gave designated funds for Technology.
  3. Enough people complained about not being able to hear/see/read.
  4. A church member visited a Mega Church or Equivalent and believes a change in technology will get people in the door.
  5. Someone owns a tech business and offers to do the work for a discount price.

Top Five Problems that arrise from spending money on technology:

  1. It breaks.
  2. The Church overspent and still can't get things to work correctly.
  3. People still can't hear/see/read as they expected to.
  4. It doesn't actually bring in the people they thought it would.
  5. It's poorly installed and the church is now constantly paying to have it "fixed"
10 Things to do to avoid the above:
  1. Don't wait for technology to break to replace it.
  2. Having one source of income might sound great to get the job done but the power struggles that come from the gift can hinder the ultimate goal of the Technology.
  3. Don't kid yourself, technology can't fix everything it can mildly improve so never promise huge improvements...just make it better.
  4. Don't let what other churches do define your church.  Just because someone else uses technology in their place doesn't mean Technology is the reason they thrive.  
  5. Having an outsider do the work is always best but sometimes you go with what you have.  Have a third party or outside consultant review the plans and make sure the insider is backed by others who know technology.
  6. Don't buy the biggest and the best.  The key is to avoid being cheap and buy quality equipment that will last AND take you into the future.  
  7. Think for the future so you leave the door open for additions and improvements.  Just cause you cannot think of a reason why you will use it now doesn't mean you shouldn't consider it for the future.
  8. Try to use what you have.  You've spent money on it and some of it might be good.  Don't just throw the baby out with the bathwater.  
  9. Think Theologically.  When does technology pass the line of improving and move into distracting? Where is your focus?
  10. Train everyone on how to use your new technology.

Sound Ministry

As technology becomes pervasive in our culture, the church begins to employ it within worship at an increasing rate. From projectors and sound systems to websites and blogs we use this technology to assit our worship practices and spread the Good News through digital means.

In so many ways the church needs to approach sound ministry as it approaches all other aspects of worship life in the church. Detailed considerations and church wide discussions need to be employed when making decisions about technology in the church. It also is important to find a person with the churches best interest in mind to lead the discussion and decision making process. This person should take the following questions into consideration.
  1. What is the end result intended by this purchase/upgrade?
  2. What are the theological implications of this purchase/upgrade?
  3. Can we use any of our current equipment in this change?
  4. Who will run and maintain the equipment for our congregation?
  5. How does our budget limit our decisions?
  6. What is the longevity of the decisions we are making?
The intent of the following blog posts is to explore these questions in a general level enabling those decision makers to ask the proper questions and hopefully lead them toward well inform decisions. If you are reading this, thank you for visiting. Please feel free to comment or ask questions.

JD